Double shed doors are something that makes a garden shed especially user-friendly. Since double shed doors offer such a wide opening, it makes it easy to take in larger items for storage or to allow for a nice open breezeway when using your shed for a man cave or she-shed. Buying double shed doors can get a bit pricey, so why not build them on your own?
In this blog, we will teach you how to build a great set of double shed doors as we share some of the insider secrets to make sure that your doors are built just like the pros. For the purposes of this blog, we are going to focus on one size of double shed doors. However, the information in the video can be used as a reference no matter the size of the doors you desire to create.
Each image shown below that states what step of the project you are on can be clicked on to take you directly to the “step” in our how-to video.
How Do I build Wooden Double Shed Doors?
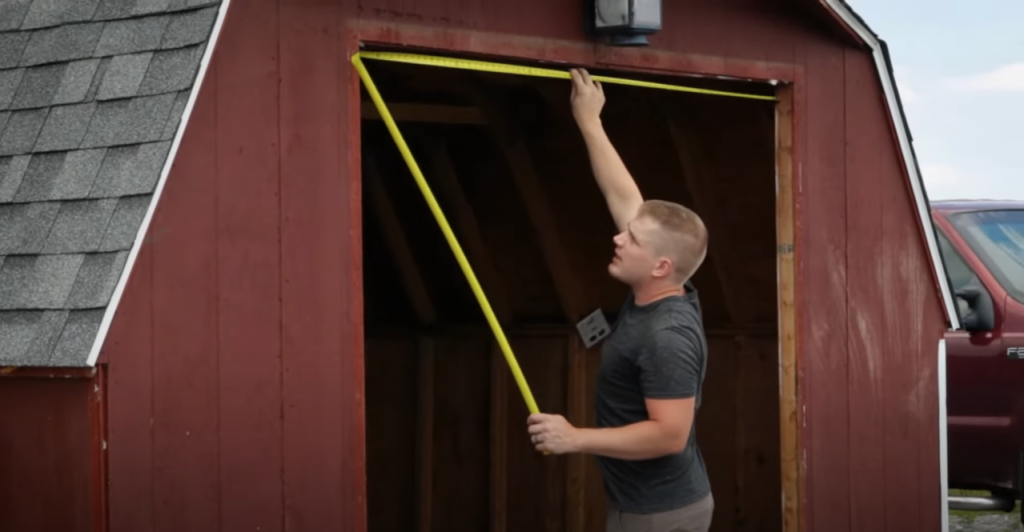
Measure Your Double Shed Door Space
The process of building double shed doors is certainly a lengthy one. However, with this step-by-step guide and frequent reference to our how-to-video, we believe you will be able to create high-quality shed doors no matter how you choose to design them.
As we said earlier, you can make your shed doors any custom size that you need. However, in this case, we are basing our shed doors on the idea that they are about 6 feet tall and 6 feet wide. Make sure that when you start the process of creating your shed doors, you take accurate measurements. This will allow you to build double shed doors that actually fit into the shed opening easily.
Gather Your Shed Door Supplies
The odds are if you are looking at a project like this, you may already have a lot of these items at your home. However, these are the tools and supplies that we would say are the bare essentials to completing the project.
Make True Measurements To Fit Double Shed Doors In The Correct Space
Once you have made your measurements, you will want to take a quarter-inch off the vertical and horizontal measurements. The reason you need to remove this amount of space is to allow the doors to open and close. If you build your shed doors to be the exact same size they will not be able to open or close easily.
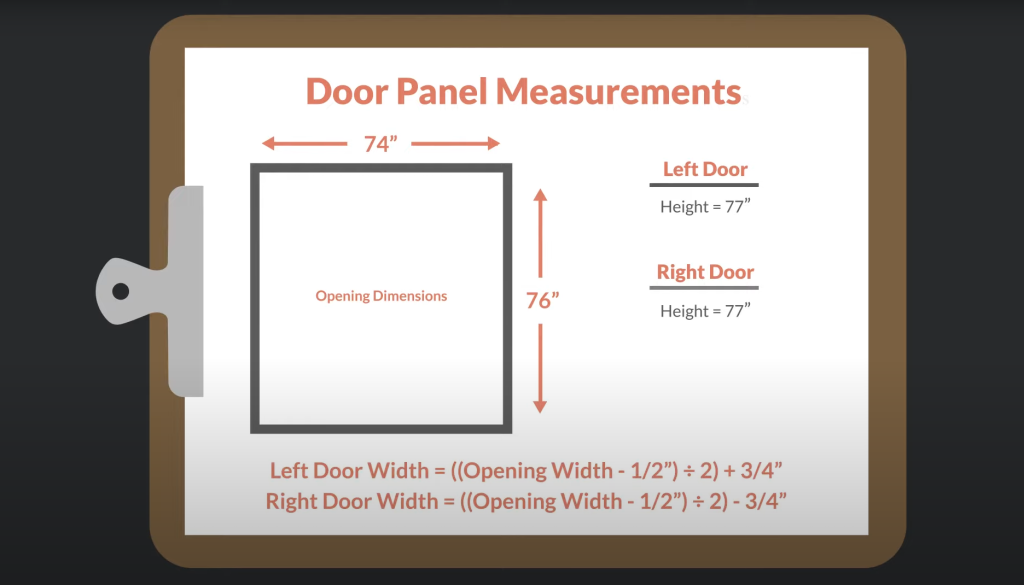
Measure And Cut Your Materials For Your Double Shed Doors
Remember those 2 sheets of LP Smart Side that are 4 ft wide by 8ft long? Well, now, you are going to need them now. Each of these sheets will need to be measured as described to make sure that your double shed door fits correctly. (In this video, we are retrofitting new doors to an old shed. So the measurements you need will most likely need to be altered).
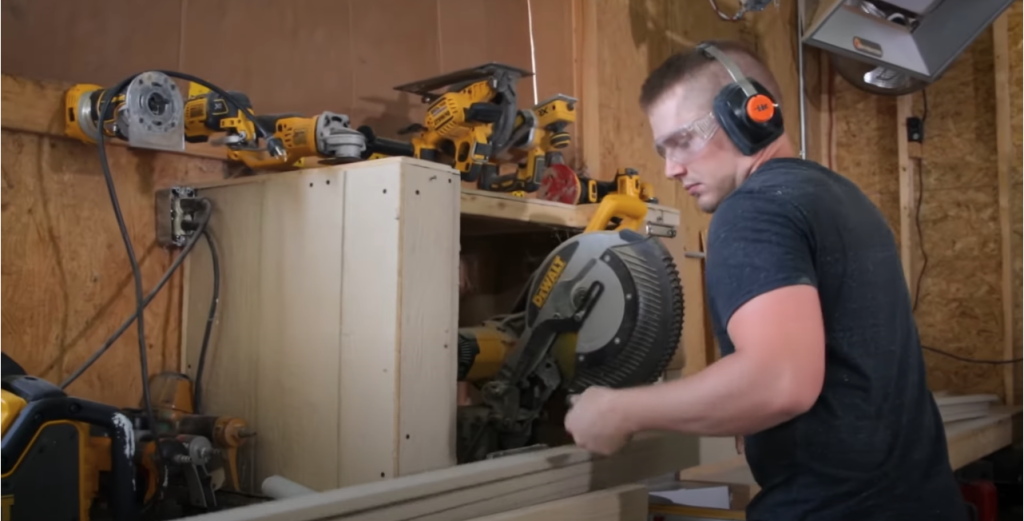
Use your speed square to make your lines as straight as possible before you begin to cut out your double shed door faces. Once your double shed doors have been measured and marked correctly, use your circular saw to cut out the shed door faces of your smart siding. In the video, we use a table saw. To be honest, it is much easier to make the cut to the LP siding doing this. However, the circular saw can be used to obtain the same results and is a much more cost-effective tool you use if you are not planning to make a lot of woodworking projects.
Frame Out The 3x4s For Your Double Shed Doors
One of the most important features of making sure that your double shed doors can withstand the test of time is to have the proper framing. The proper framing consists of using your 3×4 boards to create the proper frame that the LP smart siding, trim, and hardware will be fastened to. To cut your 3x4s to the correct dimension, you will need to use a speed square.
Once you have cut these framings down to the correct length, it is time to assemble your framing.
Build Your Double Shed Door Framing
Once you have your pieces cut out, it is time to assemble the frame.
- Take one of your 3×4 boards that are used for the height and turn it on its side so that the skinny part is facing up.
- Take one of your 3×4 boards that are used for the width, and place it skinny side up. Place the board used for the width at the top of the inside of the board used for the height that we mentioned earlier.
- Using your C-Clamp, tighten it down so that it can hold the two boards in a place where the boards meet together.
- Once it is held securely in place, use your speed square to measure down ¾” from the top. This will allow you to find the center of the 3×4 into which you are screwing the boards fast.
- Using your speed square, mark the ¾” to know where to place your screws.
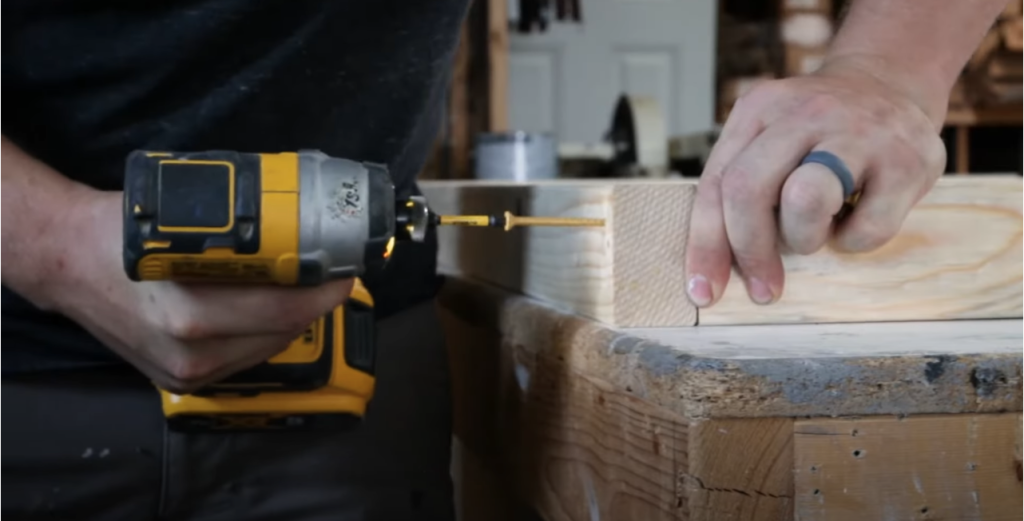
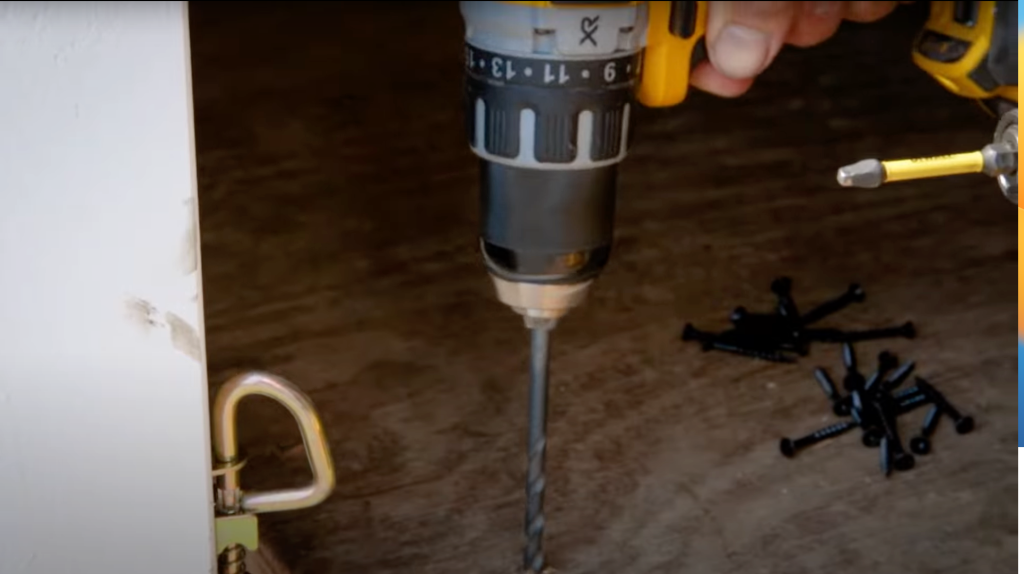
- Using your power drill, pre-drill 3 holes through the board used for the height of your door. Make sure that the holes you pre-drill are slightly smaller than the screws you will be using so they can grip onto wood and keep things in place.
- Using your impact driver, put in 3 screws through the board used for the height of your door into the end of the used for the width of your door. The two should be joined together at the place you marked earlier.
- Measure from the top of the board used for the height and find the center of your door. Using your speed square, make a line to mark this measurement.
- Get your second board used for width and turn it skinny side up and measure to ¾” and mark that spot using your speed square.
- Line up the mark on your board used for width to the mark you made in the middle of the door. This will make sure that everything is centered on this board’s placement.
- Use the C-clamp to hold the boards together, use your drill pre-drill 3 holes, and then repeat the process for the first board.
- Once you have completed these steps, you should have something that resembles the letter “E.”
- To finish this framing process for making your double shed doors, follow steps 2-11, and you will have a finalized frame that looks like the number 8.
- Once you have completed all of these steps, do the same thing to make the frame for your other door.
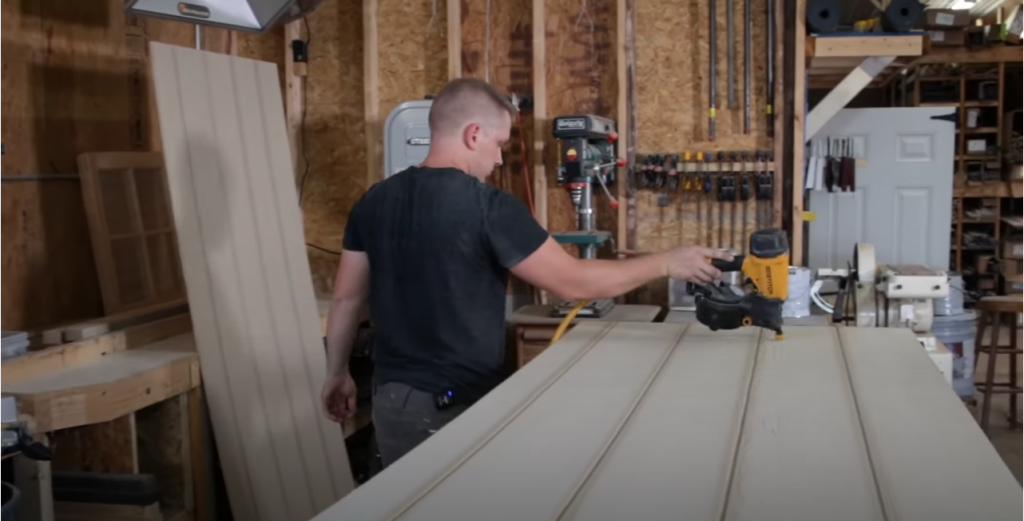
15. Once both of your frames are made, you will take the cut-down LP Smart Siding and nail it to the front of the frame before painting.
Cut Your Double Shed Door Trim
At this point, you will want to make measurements for your trim. Depending on the size of your door and trim, it will depend on how you need to cut your piece of trim. For the sake of simplicity, we are going to assume that the trim you are using is 1×4. (In reality, LP Trim Measures 3.5 inches).
To place your trim, you will want to measure your door’s LP Siding from top to bottom to know the height of the door. Do this for each side so that you can create trim that runs the length of the door that is completely uniform.
For the width trim, measure your door in the 3 places that you wish to place the trim. This should be at the top, middle, and bottom. Once you have your measurements, you will want to remove 7 inches from your measurement so that the trim fits in the inside of the trim that runs that length of the door. Once you have your pieces cut to the appropriate length, you are ready to place them on the door.
One very important step for your shed door trim is that if you wish to paint it a different color than the shed doors, it must be painted before they are placed on the doors. If you choose not to do this, it will cause issues by painting portions of your door the color or the trim or vice versa.
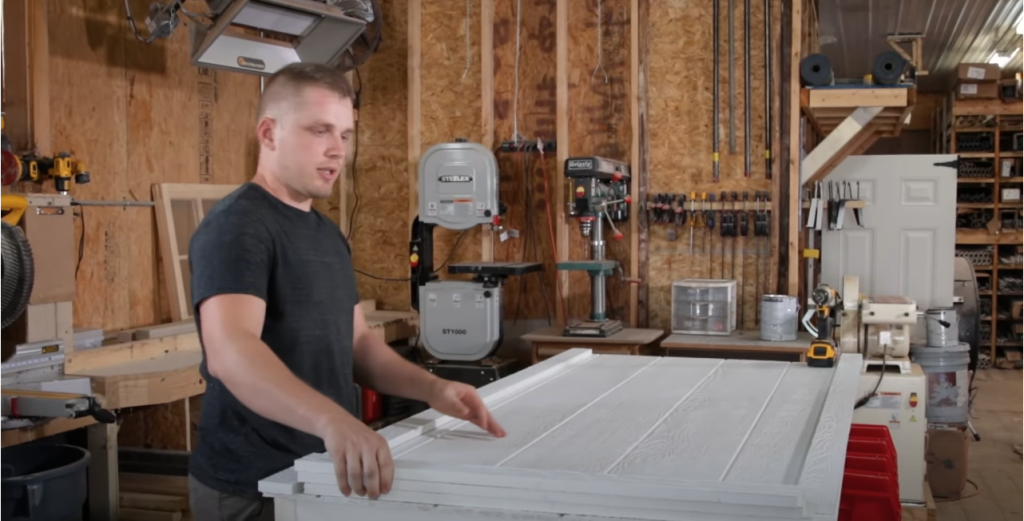
Paint Your Double Shed Doors

After you have cut out your double shed doors, you will then want to paint them your desired color. It is best to use outdoor/exterior paint so that it is capable of withstanding the elements. We like the method of installing a handle to hang them and spray paint them. However, you can paint them with a roller or brush if you desire. The one quart of paint that we told you to purchase will be what is used to paint these doors. This quart of paint should allow you to have 2 quality coats of paint on the front of the doors with a little extra for touch-ups.
How To Install The Trim and Hardware Of Your Double Shed Door
For reference, we strongly encourage that if you are going to be painting your trim and door the same colors, you paint them all at the same time. This way, you will have doors and trims that are true color matches. However, If you wish to have your trim and doors be different colors, it is best to paint them different colors before placing the trim into place.
At this point, your doors are nearly finished. The next step is to line up your trim and nail the pieces into place. using your hammer and nails, make sure the trim lines up flush to the edges of your door. Use your C-Clamp to hold the trim in place, and once it is flush, begin driving in a nail every 4 to 6 inches. Do this on all of the trim pieces until the entire door is framed in.
Now that your trim is installed, it is time to begin placing your hardware. For the purposes of this video, we have created it so that a latch is placed on the right door. Once you have placed the latch, install the hinges, snap latches, and door straightening rods.
Installing Trim Pieces On The Shed For New Double Shed Doors
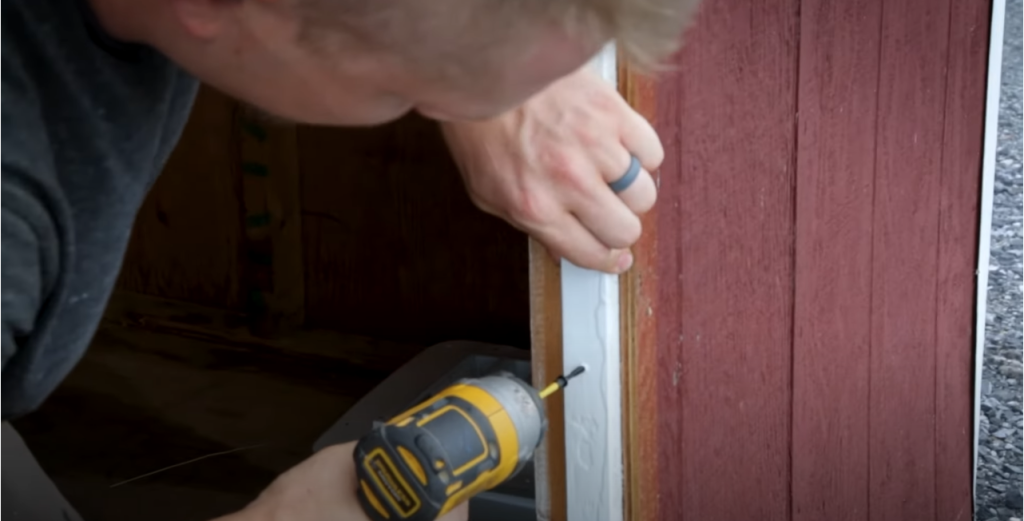
Once the hardware has been placed on your double shed doors, the next step is to install the trim on your shed. This trim on the shed will prevent the doors from swinging the whole way in and ruining the hinges. Take a look at the video above to understand how to make the proper measurements for your interior door trim.
Mount Your Double Shed Doors

Once your trim pieces are installed on the shed, it is time to mount your shed doors. To start the mounting process, you will take your first door and lift it up 1/4 inch. Place one screw in the middle hole of the top hinge. Once that is done, repeat the process on the left door. Check to see if either door is slightly higher. If one door appears to be higher than the other, undo the screw slightly in the door that seems higher, as this will bring it back to level.
Drill Holes For Your Double Shed Door Spring Latch Pins
Once you have your doors set into place, the next step is to drill holes for your latch pins. The latch pics will ensure that one door is securely in place. The best way we have found to do this is to close the door and trace around the latch pin that is at the top and the bottom. Once you have done this, find your drill bits and find a bit that is slightly larger than the pin itself. You will then drill a hole in these two locations, and then you will place your pins in the hole to make sure that the hole is the right size.
Touch Up Your Double Shed Doors With Paint

Now that your doors are hung and can be closed, it is time to touch up the paint. At this time, we suggest that you take the remaining paint that you have left and touch up the nail holes and any scratches that may be present.
Enjoy Your New Double Shed Doors
At this point in the process, it is time to start enjoying your new double shed doors. We know how much work it takes you to do this because we do it every day! However, we also know that building your own double shed doors is not always a project that everyone can feel comfortable doing on their own. To solve that problem, you can purchase replacement shed doors directly from us. If you found this blog helpful, be sure to go over to our youtube page and like the video that we created and reference throughout this blog!